
Managing Users in Just2easy
Please note:
This solution applies only to manual school accounts.
If your school uses a managed service such as C2K, Hwb, Glow, or similar, user accounts and data should be updated automatically via nightly synchronisation.
For any issues with managed services, please contact your relevant support desk.
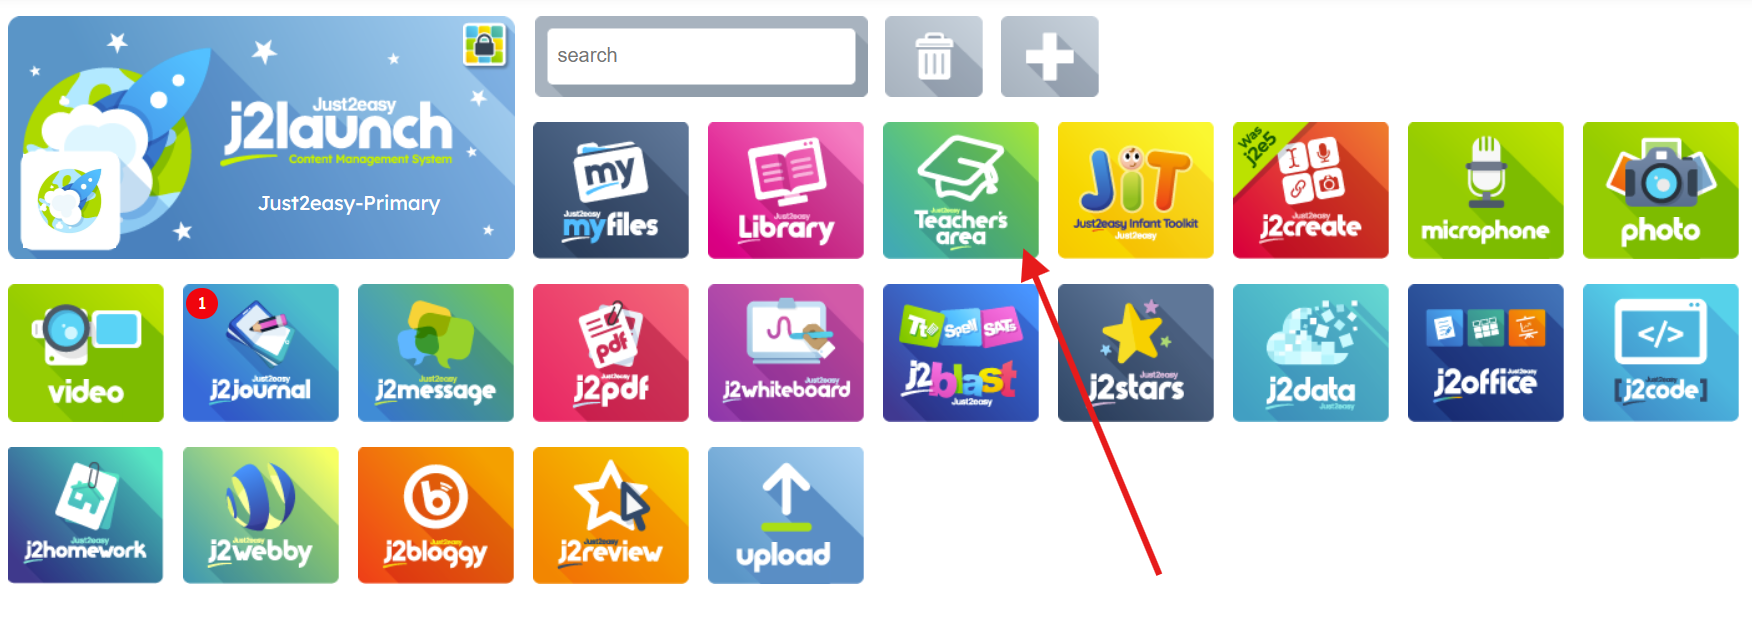
Accessing User Management
From your j2launchpad, click on the "Teacher's Area" tile.
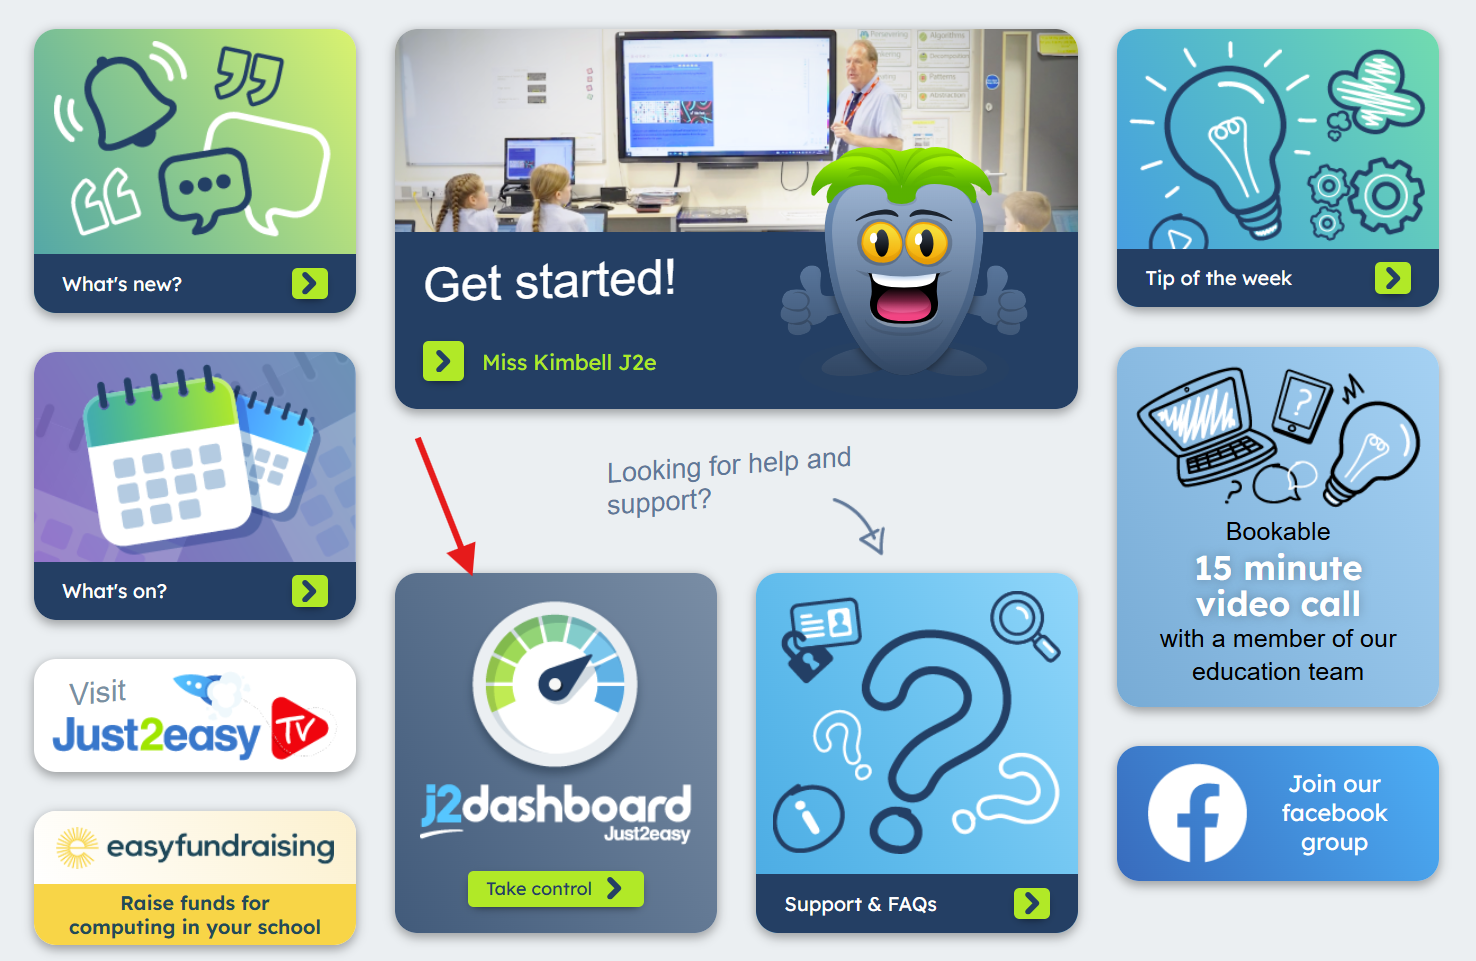
Select j2dashboard
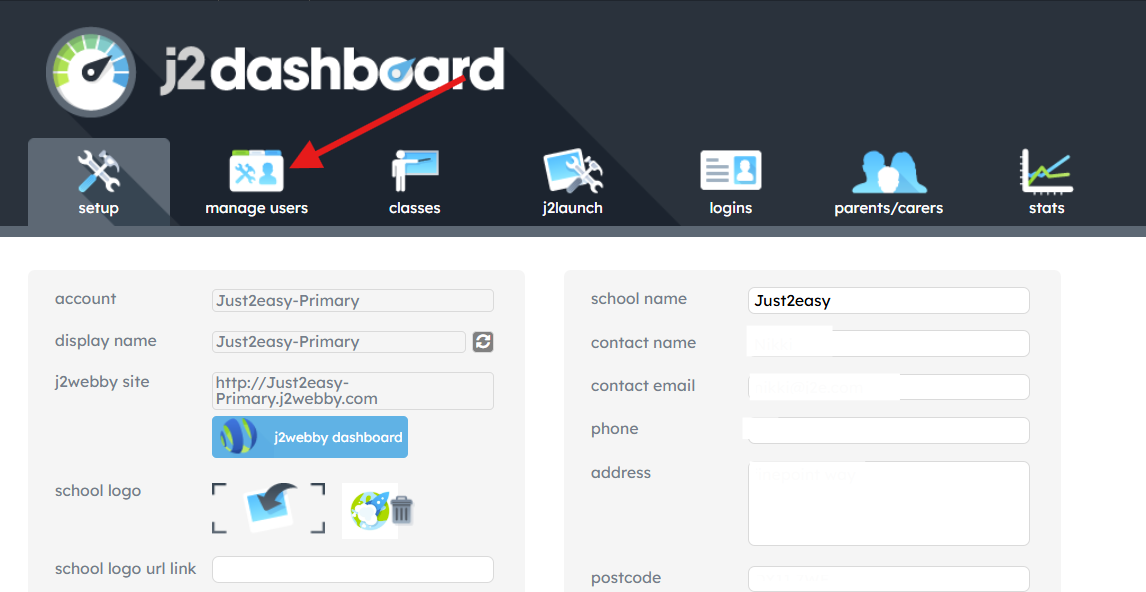
Open the Manage Users tab, where you can view and edit all user accounts.
Adding Multiple Users (Bulk Upload)
Download the CSV template from the Manage Users area. This will download a copy into your downloads folder on your device hard drive.

Open and edit the CSV with the required user data.
Upload the updated CSV file by clicking the Upload button.

This will open a window. Here you can either drag your csv. file OR click on the cloud icon to select the csv. file from the place you saved it to.

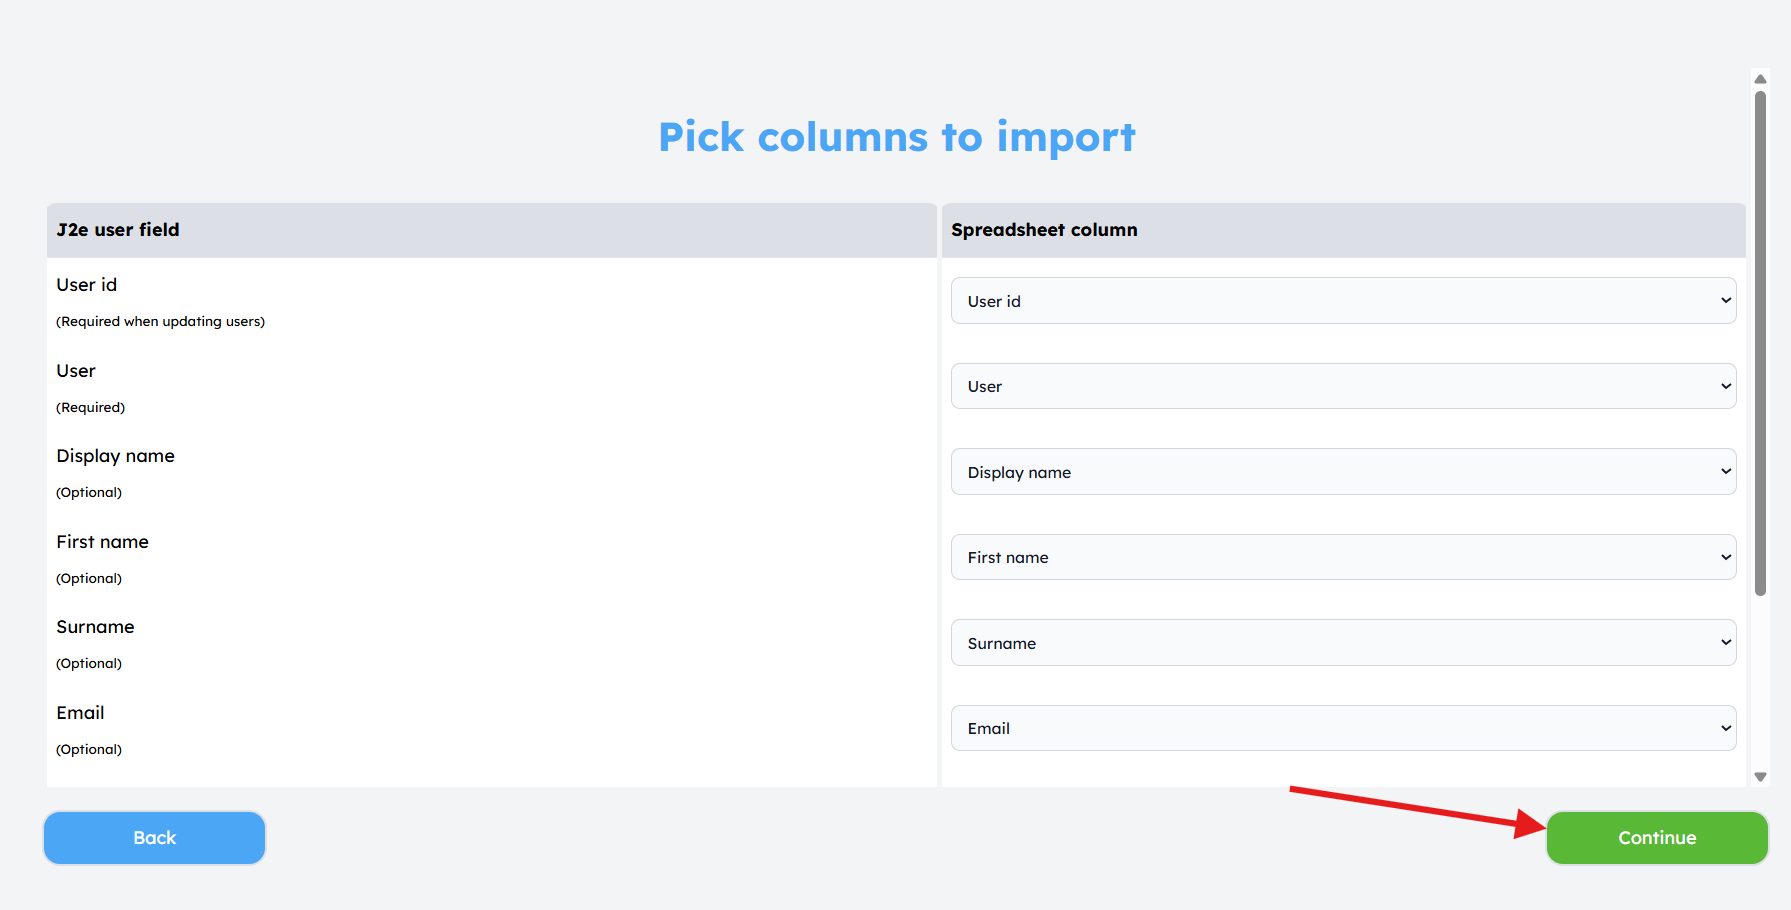
Click continue
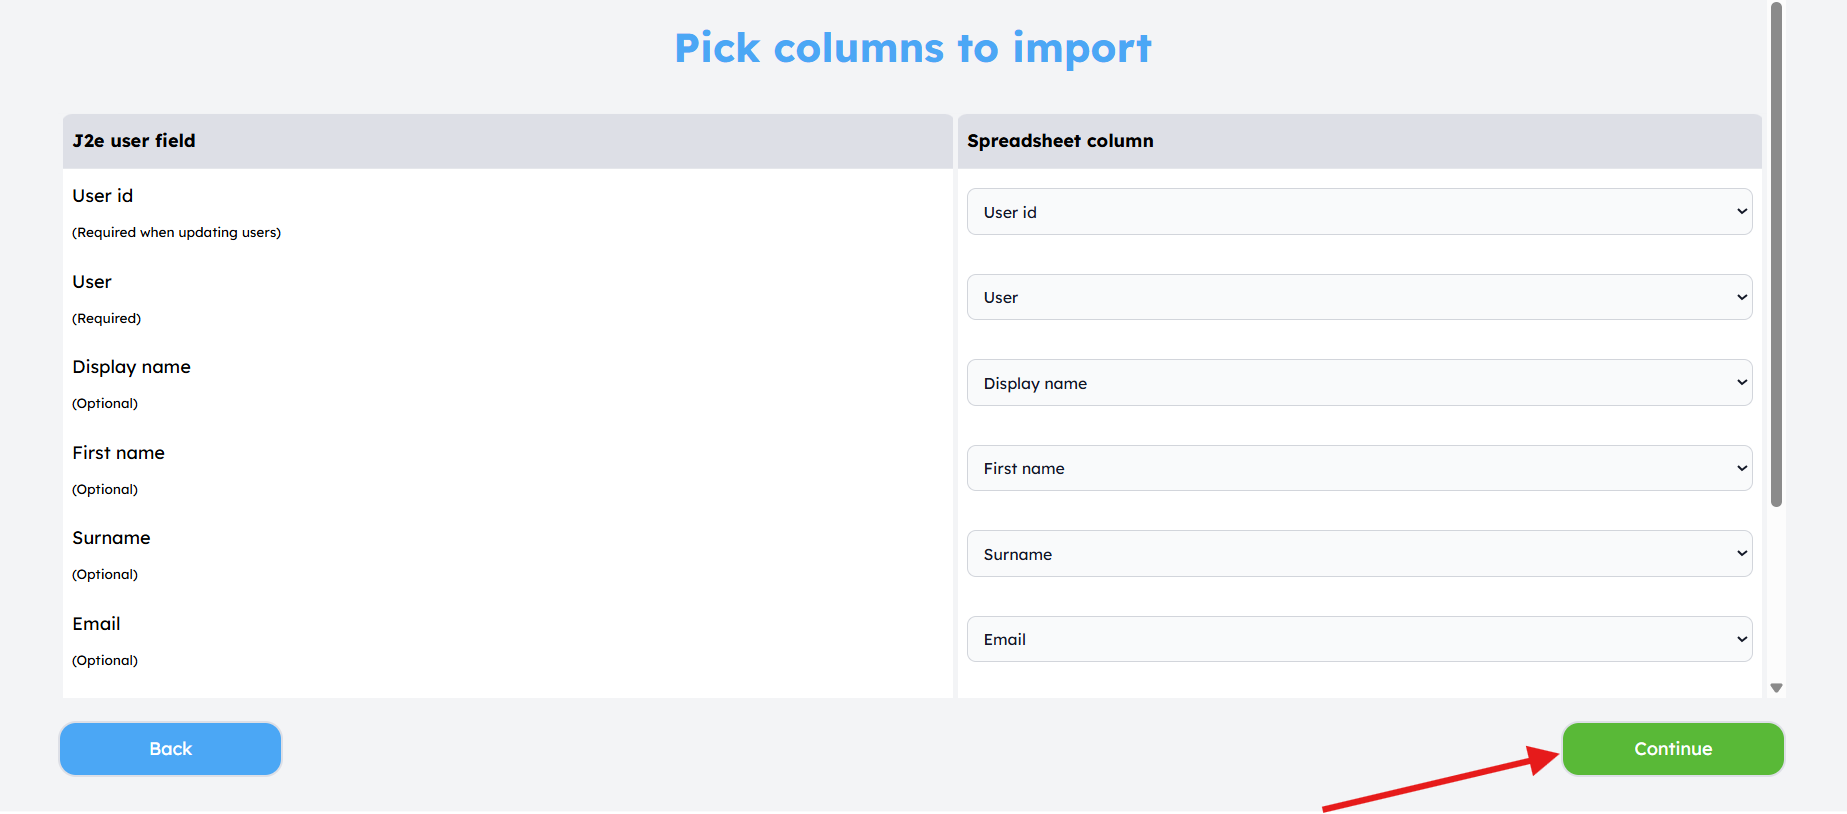
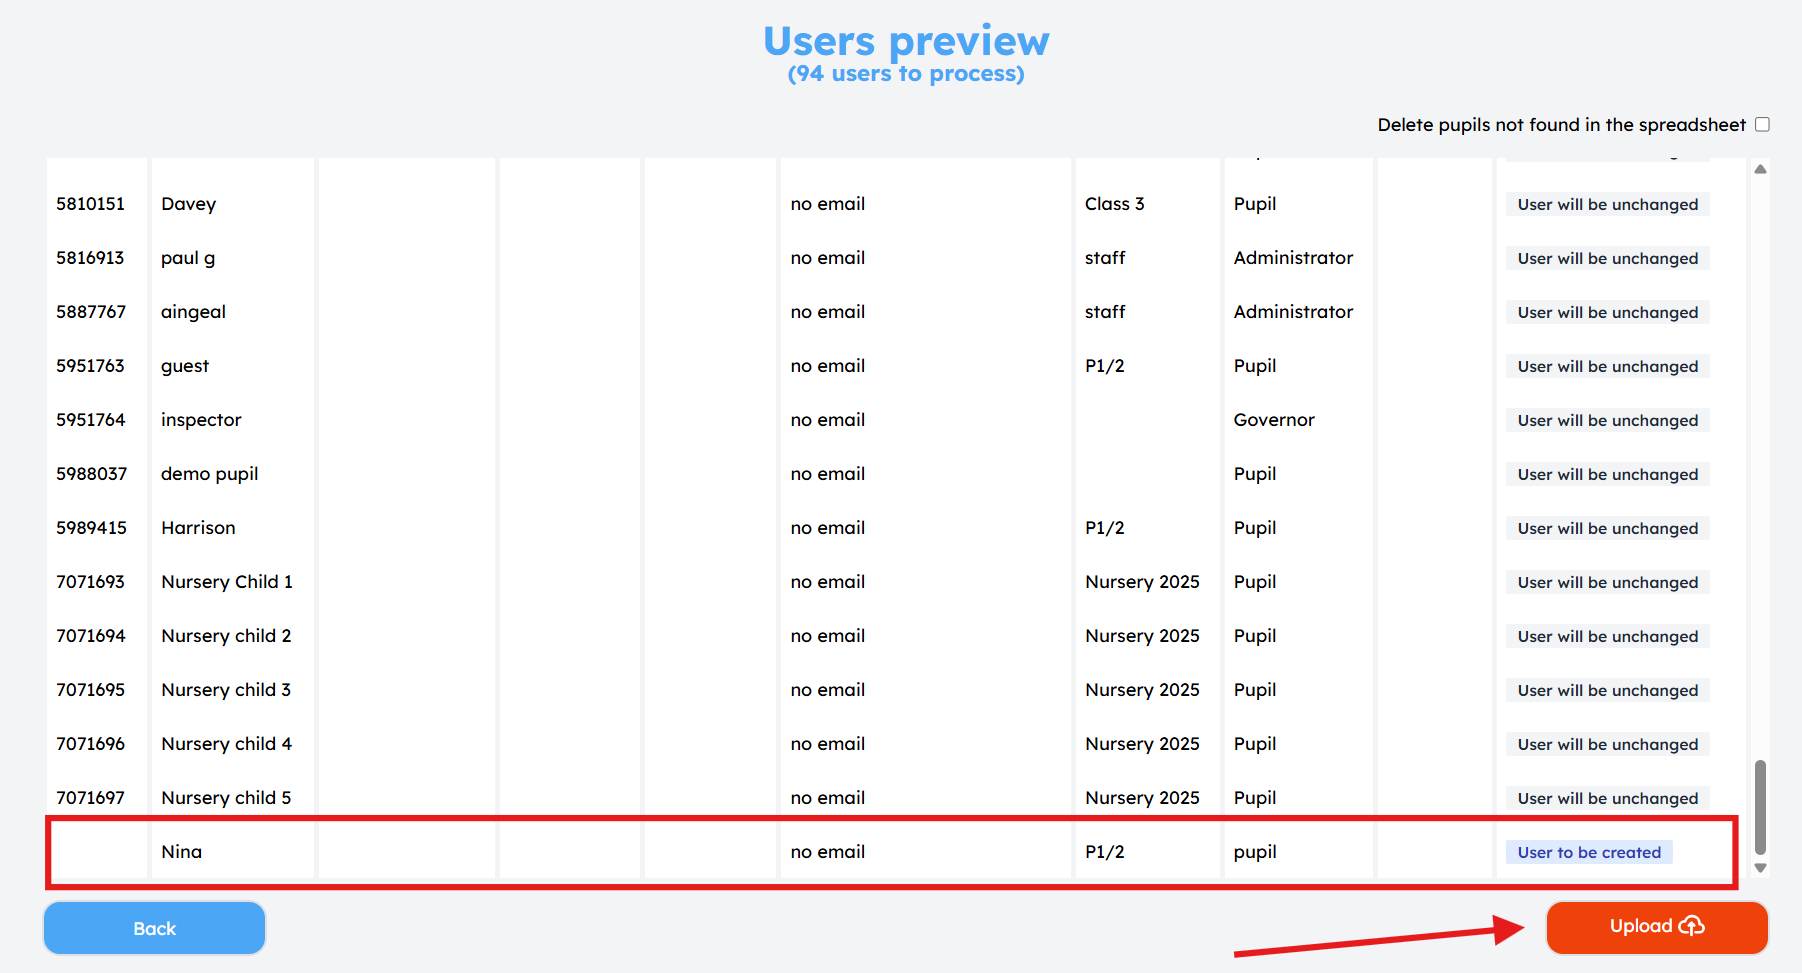
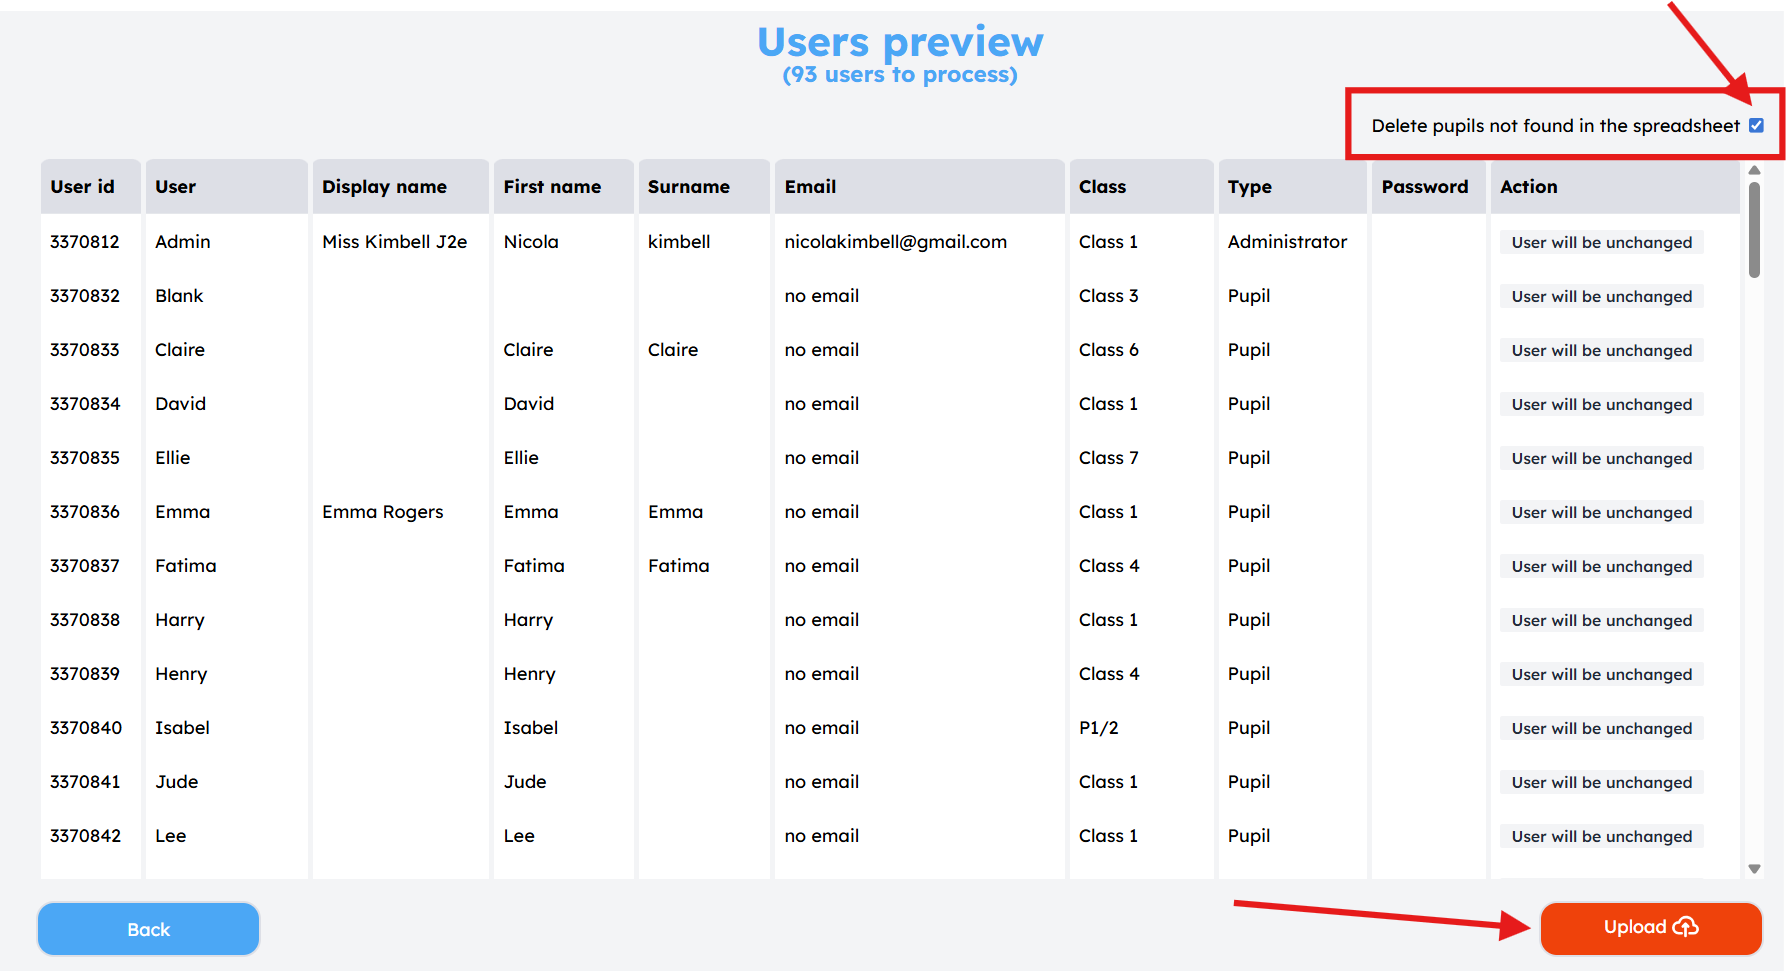
This will show you a preview of users, both existing and those to be added. Review the changes, and click "upload"
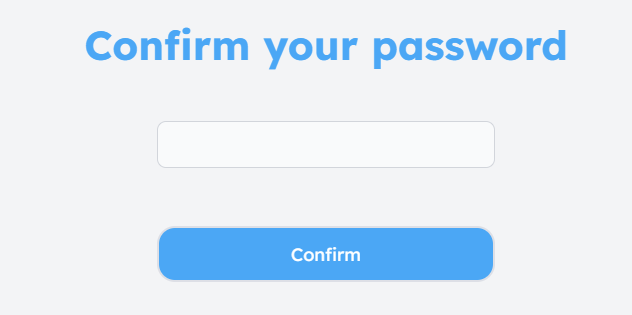
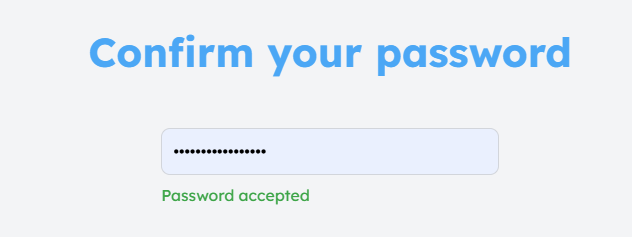
Confirm your password, and click upload
Users will be automatically created or updated, and will show within the manage users area.
Deleting multiple users
- Download the csv. as outlined above, and delete the unnecessary users within the csv. Save your csv. file.
- Click upload csv. and select the csv. file from your device

- Click continue
- Ensure "Delete pupils not found in the spreadsheet" is ticked, and click upload
- Confirm your password and click upload
- The user/s will be deleted. Click "close"
You can also add single users. You can find more information here